Growing seedlings is a process that requires special attention, since the future harvest largely depends on the quality of the seedling material. However, during the growth of seedlings, various problems may arise that interfere with the normal development of plants.
Most often, they are associated with improper care. Let's look at the most common of them and tell you how to correct the mistakes made.
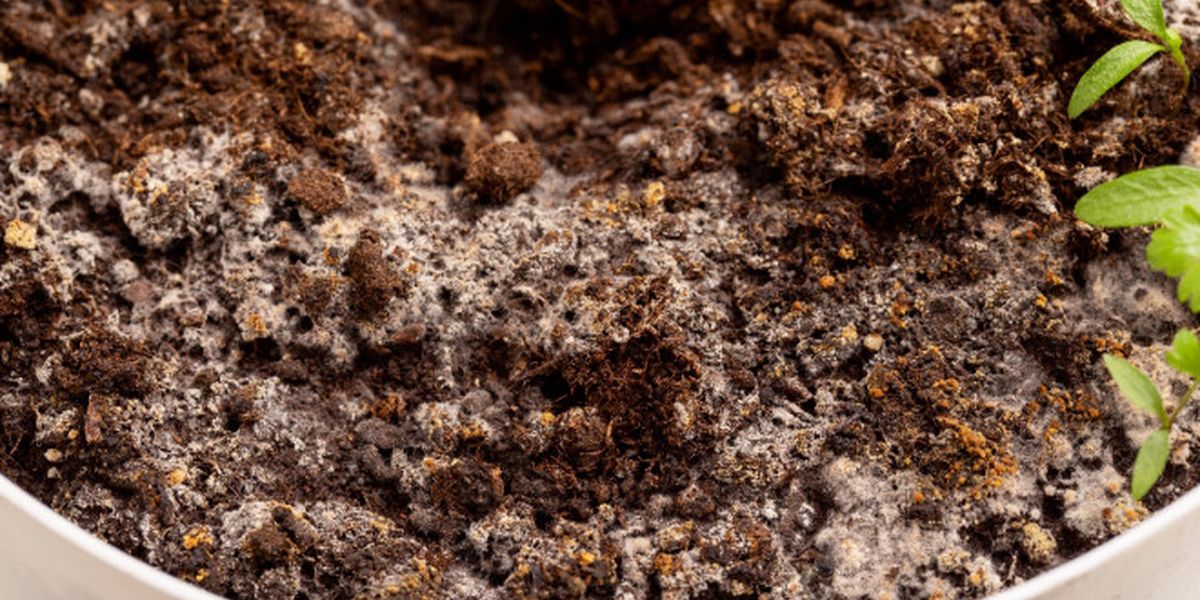
Mold on the soil
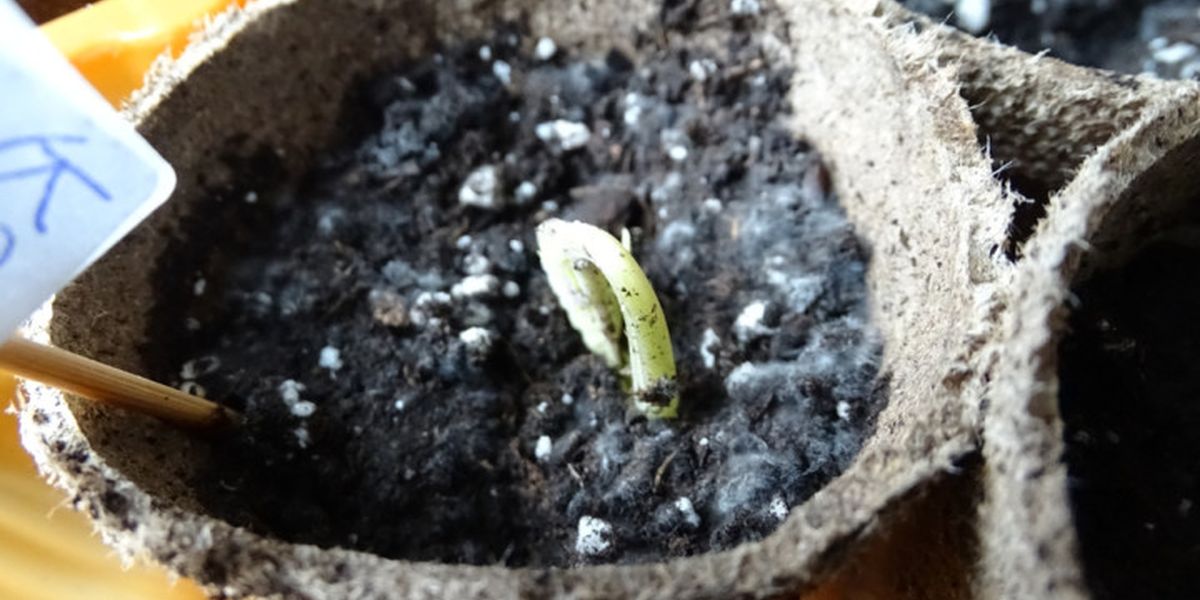
One of the common problems when growing seedlings is the formation of mold on the surface of the soil. White fluffy plaque (mold mycelium) gradually covers the surface of the soil, which makes it difficult for oxygen to enter the soil. Due to the lack of oxygen, seed germination slows down - some may not sprout at all. In addition, the root system of already emerged seedlings develops worse: the consumption of nutrients is disrupted and the roots rot.
Let's list the main reasons that lead to the appearance of mold on the soil surface:
- Excessive moisture. It is formed by excessive watering and the lack of drainage holes in the bottom of the containers.
- Poor air circulation (for example, with dense plantings).
- Using contaminated or unsterilized soil of your own making. Using purchased soil for growing seedlings less often leads to the appearance of mold.
- Low temperatures that promote the development of fungi.
How to get rid of mold:
- Remove the mold. To do this, carefully remove the top layer of soil with plaque. Add the same amount of new soil.
- Sprinkle its surface with wood ash, crushed activated carbon or sand.
- After the top layer dries, water the soil with Fitosporin-M or its analogues.
- Provide good ventilation for the plants, especially at the initial stage of cultivation. During this period, containers are usually covered with film to create a greenhouse effect, and this contributes to the formation of a humid environment and, as a result, the appearance of mold. In such a situation, do not forget to regularly ventilate the crops. Do this 2-3 times a day, and each ventilation should take 20-25 minutes.
- Reduce watering. Water the seedlings only after the top layer of soil dries.
- Check the drainage holes. If they are clogged, clean them.
Green algae on the surface of the soil
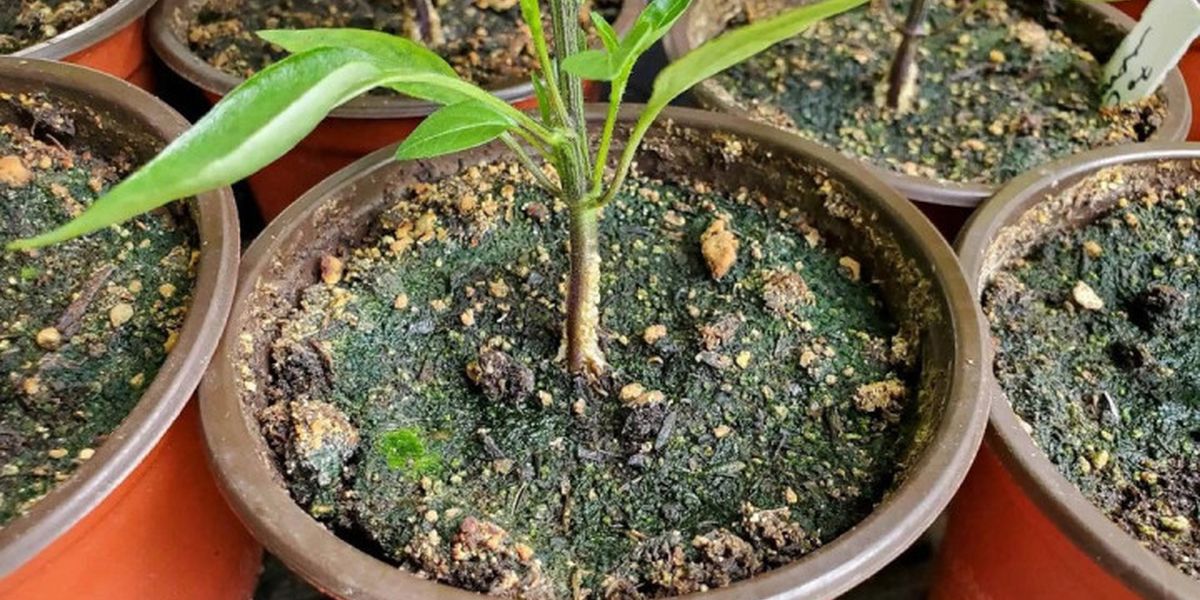
The surface of the soil in boxes and cups with seedlings is sometimes covered with a thin green coating. Green soil signals the development of algae.
Green coating prevents normal air exchange in the soil and retains moisture, which can lead to the appearance of mold. In addition, algae begin to compete with seedlings for moisture and nutrition.
The soil in containers with seedlings turns green for the following reasons:
- Active reproduction of algae is usually associated with excess moisture.
- Another reason is the effect of bright light, which algae need for development. For this reason, algae develop not only on the surface of the soil in transparent cups, but also on the inner walls. To avoid this, use opaque containers for growing seedlings.
- Acidic soil also contributes to the appearance of green plaque.
- Using soil with algae spores.
How to get rid of green plaque:
- Remove the top layer of soil covered with green plaque. Add fresh or calcined sand instead of green soil.
- Reduce watering. Water only after the top layer of soil dries. Do not forget to loosen the soil after watering.
- Use bottom watering. To do this, pour water into the tray under the seedling box. The soil will absorb exactly as much moisture as it needs. After absorption, immediately pour out the remaining water from the tray.
- Provide good ventilation: the air flow will help the soil surface dry out faster.
- Add mulch (a thin layer of sand, charcoal or vermiculite) - it will block the light from reaching the soil surface. Without light, algae will not be able to develop.
The soil dries out quickly

The opposite problem that gardeners face is the soil drying out quickly. If the soil becomes hard or crumbly, and does not retain moisture well, the seedlings experience stress. The seedlings do not receive enough moisture and nutrients, stop growing, and are more susceptible to diseases and pest attacks.
There may be several reasons why the soil in a container dries out too quickly:
- Insufficient watering. Some gardeners, fearing over-watering and the problems that it entails (root collar rot, mold, etc.), go to the other extreme - they do not water the seedlings often enough. As a result, the seedlings suffer no less than with excessive watering. In addition, it is important to remember that during certain periods of development, the plants' need for water changes. Thus, after the appearance of 2-3 true leaves, the seedlings need more moisture, so they need to be watered more abundantly.
- Using too light and loose soil. The rate at which the soil dries out largely depends on its composition. For example, sand does not retain moisture for long, and peat, if it is allowed to dry out once, will stop absorbing water altogether.
- High temperature and dry air in the room.
- Direct sunlight.
How to fix the situation:
- Moisten the soil correctly: determine the optimal frequency of watering depending on the needs of the plants, use bottom watering (into the tray), use filtered water.
- Use mulching: a layer of sphagnum moss, coconut substrate, vermiculite or sand will help retain moisture.
- Add hydrogel or vermiculite to the soil: they absorb water and gradually release it to the roots.
- Maintain optimal air humidity. You can place a container of water next to the seedlings or use a humidifier.
- Avoid overheating the soil: do not place the seedlings near batteries.
Salt deposits on the soil
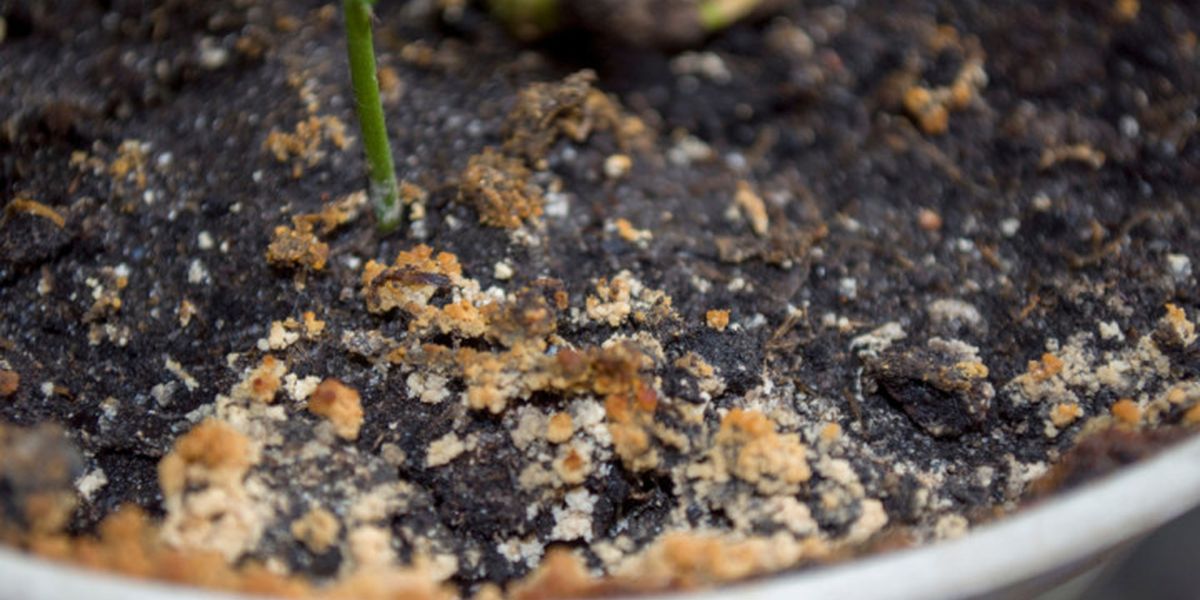
Another problem when growing seedlings can be the formation of a white or yellowish salt deposit on the soil surface.
How to distinguish a salt deposit from mold? If the deposit is fluffy in appearance and slightly slippery to the touch, it is mold. But if it is hard, slightly yellowish, visible not only on the soil surface, but also on the walls of the seedling container, it is no longer mold, but a deposit of salts. Their excess prevents the normal absorption of moisture and nutrients, which can lead to weakening of the seedlings.
Why the soil is covered with a salt deposit:
- This phenomenon often occurs when using hard water with a high salt content for irrigation.
- Another possible reason is an excess of mineral fertilizers.
- Poor drainage, trapping salts in the upper soil layer.
How to get rid of salt deposits on the soil surface:
- Carefully remove the white deposits and replace the top layer of soil. Sprinkle the surface with river sand.
- Use soft water for watering - settled, boiled, melted or rainwater.
- Water correctly: do not flood the plants, but moisten the soil moderately. In addition, it is advisable to water into the tray, not from above.
- After watering, carefully loosen the soil.
- Minimize the use of mineral fertilizers. If possible, replace them with organic ones.
Soil flies (fungus gnats) on seedlings
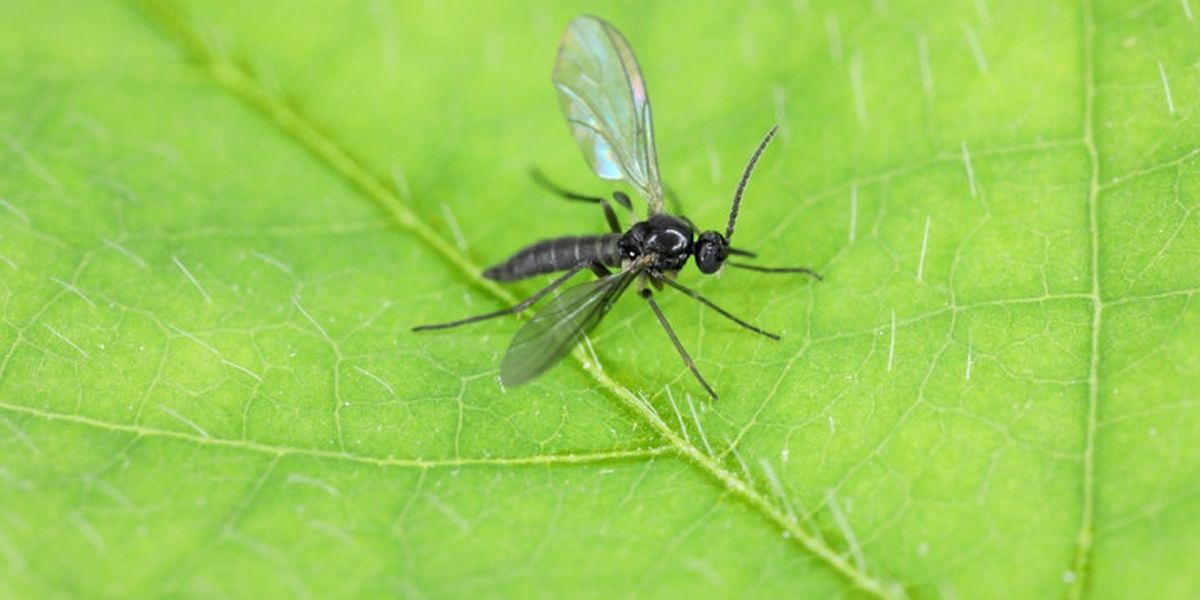
Another common problem that arises when growing seedlings is the appearance of soil flies (other names - fungus gnats, sciarids, detritus). Imagoes do not feed, so they only cause indirect harm - with their fertility: each female lays up to 250 eggs.
But direct (and very serious) harm to young seedlings is caused by larvae hatched from these eggs. Immediately after hatching, they begin to intensively feed on organic matter in the soil, humus and weak roots of seedlings. Damage to the root system negatively affects the growth of seedlings and leads to a slowdown in their growth and even death. To save your seedlings, you need to start fighting insects immediately after they appear.
The main reasons for the appearance of soil flies on seedlings:
- Excessive watering, which creates a favorable environment for the reproduction of fungus gnats.
- The use of unripe organic matter, which attracts pests. The appearance of fungus gnats is also facilitated by popular summer residents' "folk" fertilizers: used tea, banana peel infusion, meat water and other organic waste. They bring little benefit, but they attract soil gnats.
- Soil contaminated with pest larvae.
How to fix the situation:
- Remove the top layer of soil and replace it with dry. Sprinkle the surface of the soil with sand or ash.
- If it is not possible to remove the soil, let it dry out: the larvae of the soil fly will not be able to live in dry soil. In the future, water the crops moderately. Try to water into the tray, and not from above, so that the upper layer of soil (and this is where the larvae live) is drier. After each watering, loosen the soil, but do it very carefully so as not to damage the delicate roots of the seedlings.
- Hang or lay out sticky tape next to the seedling containers - the simplest, but at the same time effective means of combating the imago of the fungus gnat.
- Set traps: small containers with apple cider vinegar or sweet syrup will attract and help catch adult flies.
- If gentle means do not work, use industrial insecticides, such as Aktara. They will help get rid of the larvae.
Even experienced gardeners may have problems with the soil when growing seedlings. But if you identify the cause in time and take action, the situation can be easily corrected. Then the seedlings will be healthy and strong by the time they are planted in open ground.